Free Beginner Crochet Pattern

Rojas
Beach Cover-Up

A shell-mesh beach dress crocheted from two simple rectangles — pink cotton mesh, red single-crochet borders, a braided waist tie and a short fringe at the hem.

Designed by Franni · US crochet terms

Sizes XS–3XL 2 panels 2.5 mm hook Cotton yarn
Start crocheting ↓
FREE
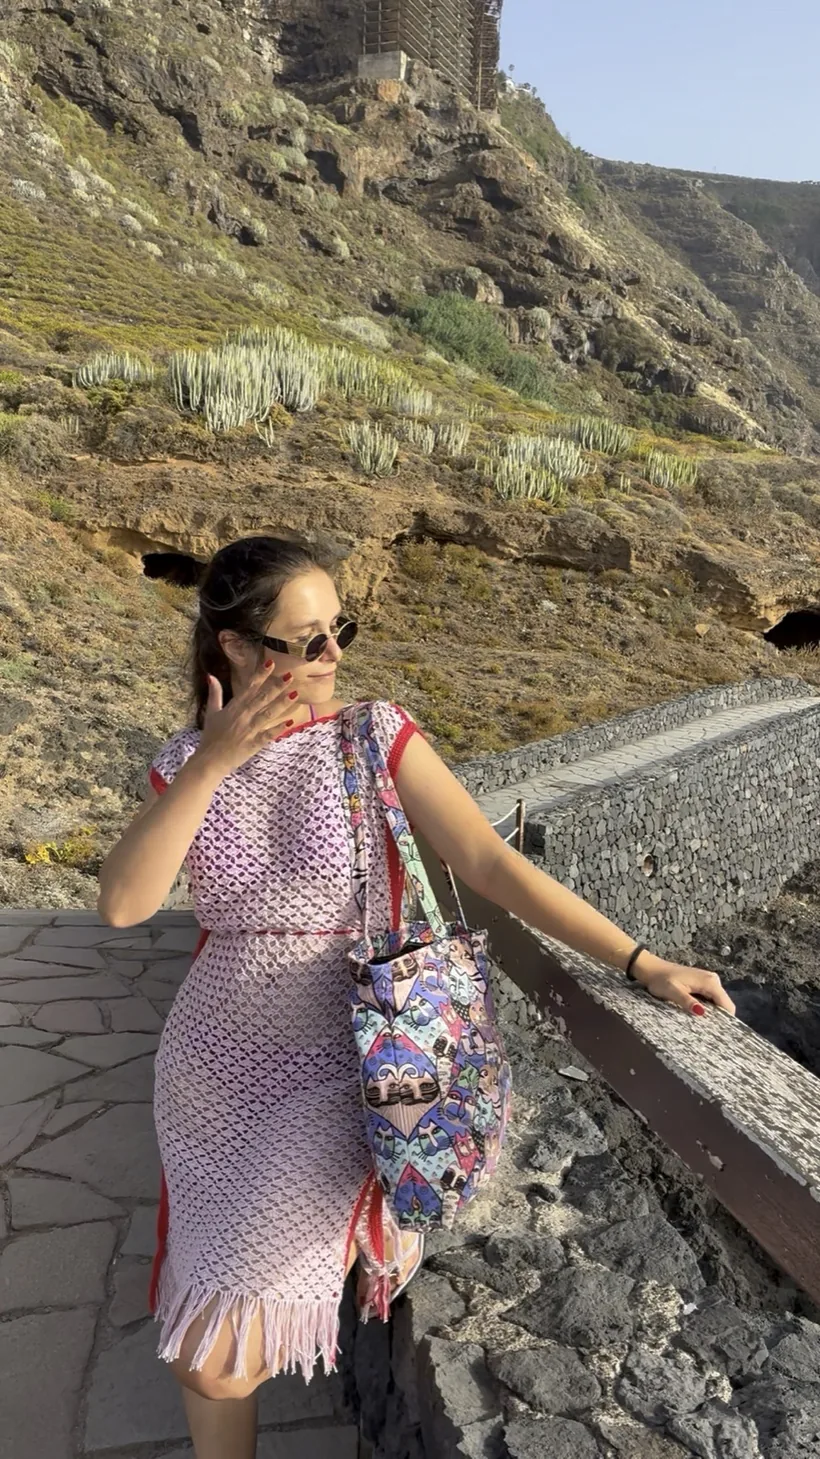
Model wearing the Rojas Beach Cover-Up with red side borders and fringe, on a coastal path in Tenerife
Pattern at a glance

Everything before the first chain

The pattern is written in sizes XS–3XL and is graded by full shell-mesh repeats, so every size keeps the stitch pattern balanced. The sample shown is Size M.

Skill levelAdventurous beginner: chains, single & double crochet, chain spaces, simple seaming and fringe.
ConstructionTwo matching rectangles, red borders, shoulder seams, side seams, braid and fringe.
Hook2.5 mm crochet hook.
YarnMelissa Algodon Artesania cotton — light and breathable.
Fit methodChoose by hip measurement first, then adjust length and waist-tie position.
Sample shownSize M, made for bust 80 cm, hip 95 cm, height 160 cm.

Make it yours

  • More hip coverage: choose the next size up or add one 12-chain repeat to each panel.
  • Less width: choose the next size down or remove one 12-chain repeat from each panel.
  • Longer dress: add rows before adding fringe. Shorter: work fewer rows.
  • Deeper armholes: leave more space open at the top side seams.
  • Shorter side slits: seam farther down from the armhole to leave a shorter opening.
Size, gauge & planning

Pick your size once — the pattern follows

Choose your size from the widest body measurement you want to cover, usually the hip. Every number below and in the instructions updates to your size.

Your size M

Pick your size in the panel and every number in this pattern updates to match. If you are between sizes, choose the larger one for a more relaxed beach-cover-up fit and extra coverage. Your choice is remembered on this device.

Measurements in
SizeHip rangeRepeats / panelStart chPanel widthFlat widthRowsShell unitsLength + fringePink yarnRed yarn
82–88 cm12148 ch39 cm78 cm1286483 cm52
88–94 cm13160 ch42 cm84 cm1326686 cm52
94–100 cm14172 ch45 cm90 cm1366888 cm62
100–108 cm15184 ch48 cm96 cm1407090 cm62
108–116 cm16196 ch51 cm102 cm1447293 cm72
116–124 cm17208 ch54 cm108 cm1487495 cm82
124–132 cm18220 ch56 cm112 cm1527697 cm82
Panel width is measured after adding the red side borders. Flat width is the approximate full garment width laid flat around the body. The mesh is open and stretchy, so the finished flat width is intentionally smaller than the body hip range.

Gauge

Shell Mesh Stitch: 42 sts × 17 rows = 10 × 10 cm, measured after blocking. Easier to check over 20 × 20 cm: 7 shells and 7 spaces across (84 ch) by 17 shell units (34 rows).

Work your swatch with the same yarn and hook, then wash and block it as you plan to treat the finished garment. Make it at least 12 × 12 cm, lay it flat without stretching, and measure across the central 10 cm. Match the stitch count first: more than 42 sts means your work is too tight — try a larger hook; fewer means it is too loose — try a smaller one. The 10 cm window cuts through half a shell on both axes, which is why the 20 cm measurement is the reliable one.

Width & length formulas

  • Starting chain = 12 × number of repeats + 4. For your size: 12 × 14 + 4 = 172 ch.
  • Length for your size: 136 rows (68 shell units) per panel — 80 cm before fringe, 88 cm once the fringe is on.
  • To lengthen or shorten, add or remove rows 4 at a time (2 shell units, about 2.5 cm). The stitch runs on a 4-row cycle, so only whole 4-row steps finish the panel the same way for the borders.
  • To pick your own length, measure from your shoulder to where you want the hem, take off the 8 cm of fringe, and round to the nearest 4 rows.
Yarn & tools

What you need

Measurements in
Main yarnMelissa Algodon Artesania, Artesania-6 pink, dye lot 0290. Each ball is approx 60 g / 240 m.
QuantityFor your size: 6 balls. (XS–S: 5 · M–L: 6 · XL: 7 · 2XL–3XL: 8.) Size M takes about 1300 m. Buy them together in one dye lot, and add extra if you lengthen the panels or want a denser fringe.
Contrast yarn2 balls Melissa Algodon Artesania, Artesania-9 red, dye lot 0290 — about 300 m for size M. The borders, neckline and waist tie take more than one ball in every size.
Hook2.5 mm crochet hook.
NotionsYarn needle, scissors, measuring tape, stitch markers or pins, blocking tools if desired.

About the yarn

The sample is crocheted in Melissa Algodon Artesania, a 100% cotton that stays light over a swimsuit and dries fast on the walk home.

This is what I use: pick the yarn and the colours you love.

A ball of Melissa Algodon Artesania cotton in Artesania-6 pink, the yarn the sample is crocheted in

Abbreviations — US terms

ch chain
sc single crochet
dc double crochet
st / sts stitch / stitches
sp space
ch-5 sp chain-5 space
rep repeat
RS right side
shell 5 dc in the same st or sp; edge half-shells use 3 dc
How to crochet the shell mesh

Learn the four-row rhythm

Foundation multiple: 12 ch + 4. Your size uses 172 ch, which gives 14 full repeats.

  1. Row 1 (RS). Work 2 dc in the 4th ch from the hook; the skipped chains count as the first dc, making a 3-dc half-shell. Rep: skip 2 ch, sc in next ch, ch 5, skip 5 ch, sc in next ch, skip 2 ch, 5 dc in next ch. Repeat across. On the final repeat, end with 3 dc in the last ch instead of 5 dc. Turn.
  2. Row 2. Ch 1; this does not count as a stitch. Sc in the first dc. Rep: ch 5, sc in the next ch-5 sp, ch 5, sc in the center dc of the next shell. Repeat across, placing the final sc into the edge of the last half-shell. Turn.
  3. Row 3. Rep across: ch 5, sc in the next ch-5 sp, 5 dc in the next sc, sc in the next ch-5 sp. End with ch 2 and dc in the last sc to keep the edge straight. Turn.
  4. Row 4. Ch 1; this does not count as a stitch. Sc in the first dc. Rep: ch 5, sc in the center dc of the next shell, ch 5, sc in the next ch-5 sp. Repeat across. Turn.
  5. Row 5. Ch 3; this counts as the first dc. Work 2 dc in the first sc to make an edge half-shell. Rep: sc in the next ch-5 sp, ch 5, sc in the next ch-5 sp, 5 dc in the next sc. Repeat across. On the final repeat, end with 3 dc in the last sc instead of 5 dc. Turn.

Repeat Rows 2–5 for the rest of the panel.

Stitch notes

  • The half-shells at the edges help keep the panels rectangular.
  • When resizing, change the width by full 12-chain repeats only.
  • For your size, work 136 rows per panel unless adjusting length.
Shell mesh stitch chart 13524
Shell mesh stitch chart, rows 1–5 — rows 2–5 repeat. Dark rows are the shell rows, grey rows the ch-5 mesh rows between them; the filled-in chains are the starting chains of each row. Crosses are sc, tall symbols are dc.
Crochet your panels

Two identical rectangles

Make two identical panels in the main pink yarn, using the starting chain for your size. Open the panel to count your rows as you go — it remembers where you left off.

  1. Ch 172 for size M.
  2. Work Row 1 of the Shell Mesh Stitch.
  3. Continue in pattern, repeating Rows 2–5, until the panel measures 80 cm before fringe (136 rows for your size).
  4. Fasten off and weave in the main yarn ends that will not be used for seaming.
  5. Lay the panel flat without stretching and check that it is rectangular before adding the red borders.
  6. Panel 2: repeat exactly. Both panels must have the same number of repeats, rows and finished measurements before assembling.
Tip. If your two panels differ slightly, you can try to block or steam them gently, following the yarn-care instructions, to help them match before adding the red borders.
Shoulder seamsJoin to leave 18 gaps open. Shell mesh panelsTwo matching rectangles. Work to your chosen lengthbefore borders and fringe. Narrow red edging3 sc along neckline. Red side borders3 sc over every 2 rows,then work 7 sc rows. Adjustable waist tieThread braid or i-cordthrough the mesh. Pink fringe with red side accents
Construction overview: two rectangles, red borders, waist tie threaded through the mesh, fringe at the hem.
Red borders & assembly

Give it its shape

Neckline and shoulders

  1. With red yarn, work 3 rows of sc along the top/neckline edge of each panel to create the red border.
  2. Place the front and back panels together with the top edges aligned.
  3. Join each shoulder from the outside edge toward the center, closing 5 mesh gaps on each side. This leaves 18 gaps open for the neckline in every size.
  4. Leave the center open for the neckline.

Side borders

  1. With red yarn, work evenly in sc along one long side edge of a panel: work 3 sc over every 2 rows, placing 1 sc in the chain-row edge and 2 sc in the dc-row edge.
  2. Work 7 rows of sc total for that red side border, then repeat on the other long side of the same panel.
  3. Repeat for both long sides of the second panel.

Side seams, armholes and side slits

  1. Align the front and back panels at the side borders.
  2. Starting below the armhole, seam the red side borders together.
  3. Leave 25 cm open at the top of each side for the armholes.
  4. Leave 20 cm open at the bottom of each side for the lower side slits. Between the two openings you should be seaming about 35 cm — the openings grow with your size, the seam between them barely does.
  5. Weave in all ends.
Front view of the finished crochet dress hanging from a red hanger
Waist tie & fringe

The details that make it

Red braided waist tie

  1. Make a red braid or i-cord long enough to thread around your waist and tie comfortably.
  2. Choose the under-bust level on the garment. The braid can be placed wherever it suits your body because it threads through the existing mesh openings.
  3. Thread the braid through the shell mesh openings all the way around the cover-up.
  4. Tie it at the back, or move the tie position if preferred. No separate belt loops are used.

Fringe

  1. For each fringe group, use 2 strands of yarn. Fold them in half so each finished group has 4 ends.
  2. Cut the strands long enough to trim neatly to your preferred finished fringe length after attaching.
  3. Along the pink lower edge, add pink fringe groups into the mesh spaces and shell sections: use 3 pink groups in the spaces and 3 pink groups in the shell area of each repeat.
  4. At each red side border, add 3 red fringe groups plus 1 mixed red/pink group if you want to match the shown side accent.
  5. Hang the garment, let the fringe settle, then trim it evenly to your preferred length.
Close-up of shell mesh with the red waist tie threaded through the openings, the two ends hanging down
Close-up of the shell mesh and hand-tied pink fringe
Off the hook

A note from Franni

This cover-up is made to adapt to you. Before wearing it, make sure the ends are woven in and gently block or steam the mesh only if suitable for your yarn.

Thank you for making the Rojas Beach Cover-Up. This is my first crochet pattern, and I hope it becomes a piece you love to wear and make your own.

Your feedback is warmly welcome — and if you feel like sharing, I would be delighted to see a photo of your finished cover-up.

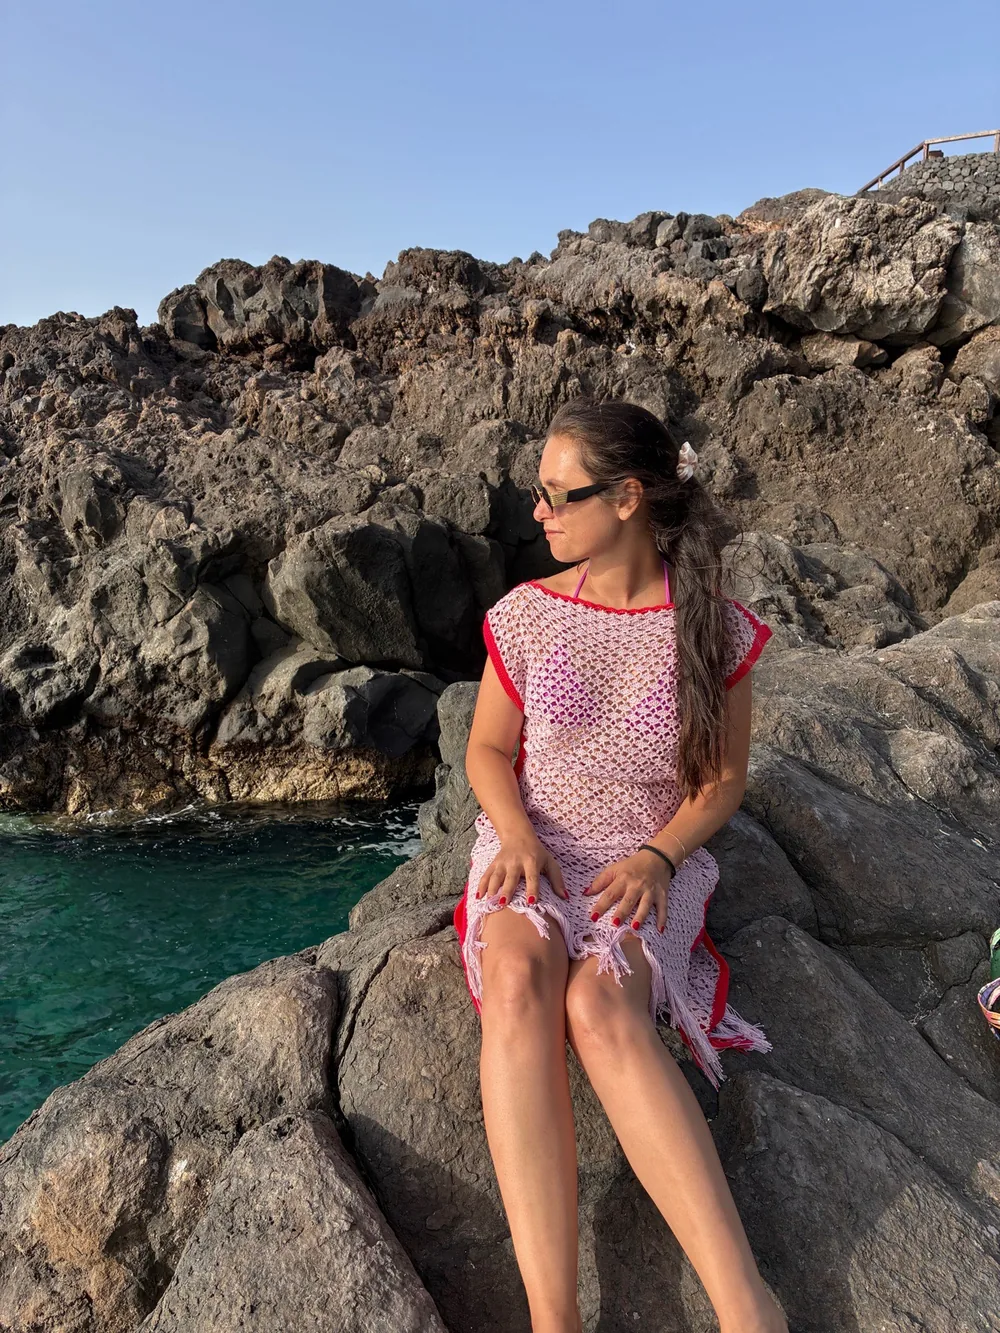
The Rojas Beach Cover-Up worn at a volcanic sea pool in Tenerife